
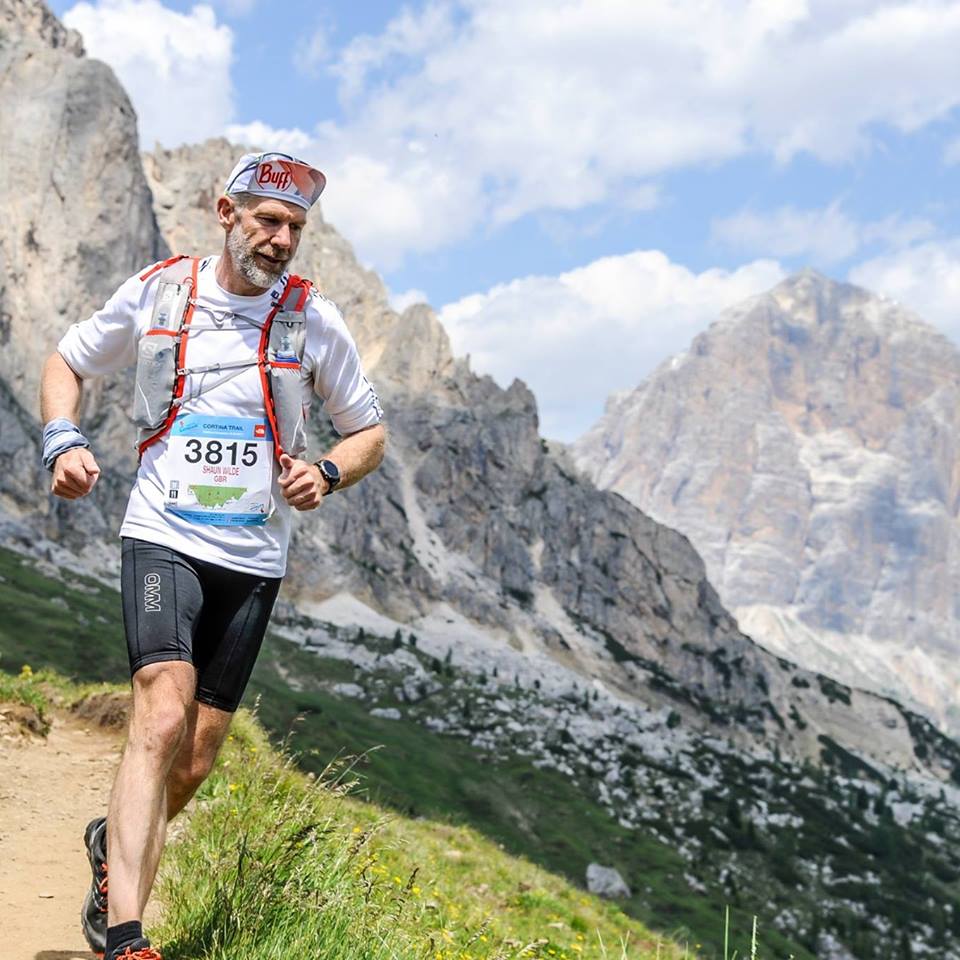
 I’m sure many of you are planning to do lots of the running in the new year, and this is because running is awesome for your health and fitness!
Not only is running great for you, it’s a hugely diverse sport, with countless variations from the 100m sprint on a track, to a 100-mile ultra-marathon across a desert. It is also an integral component of many other sports. For example, football, rugby and field hockey.
There are however, some risks associated with running. Numerous studies show that a high percentage of both novice and professional runners experience pain or injuries as a direct result of the miles they clock up. It’s not uncommon for the runners I work with in my Strength & Conditioning gym to believe that getting injured during their career is a given.
All physical training is a stress on the body. Stress causes adaptation, which in turn improves performance. However, it is important to know that physical stress should not be confused with injury. Runners get injured mainly because they haven’t developed enough strength and endurance to cope with the stresses that running places on them.
In this article, I have listed three activation drills that will both maximise performance, and help to keep your structure in good health… These drills, and many more are included in my 2nd book – Strength and Mobility Exercises for Runners, which will be published in the new year.
The Exercises
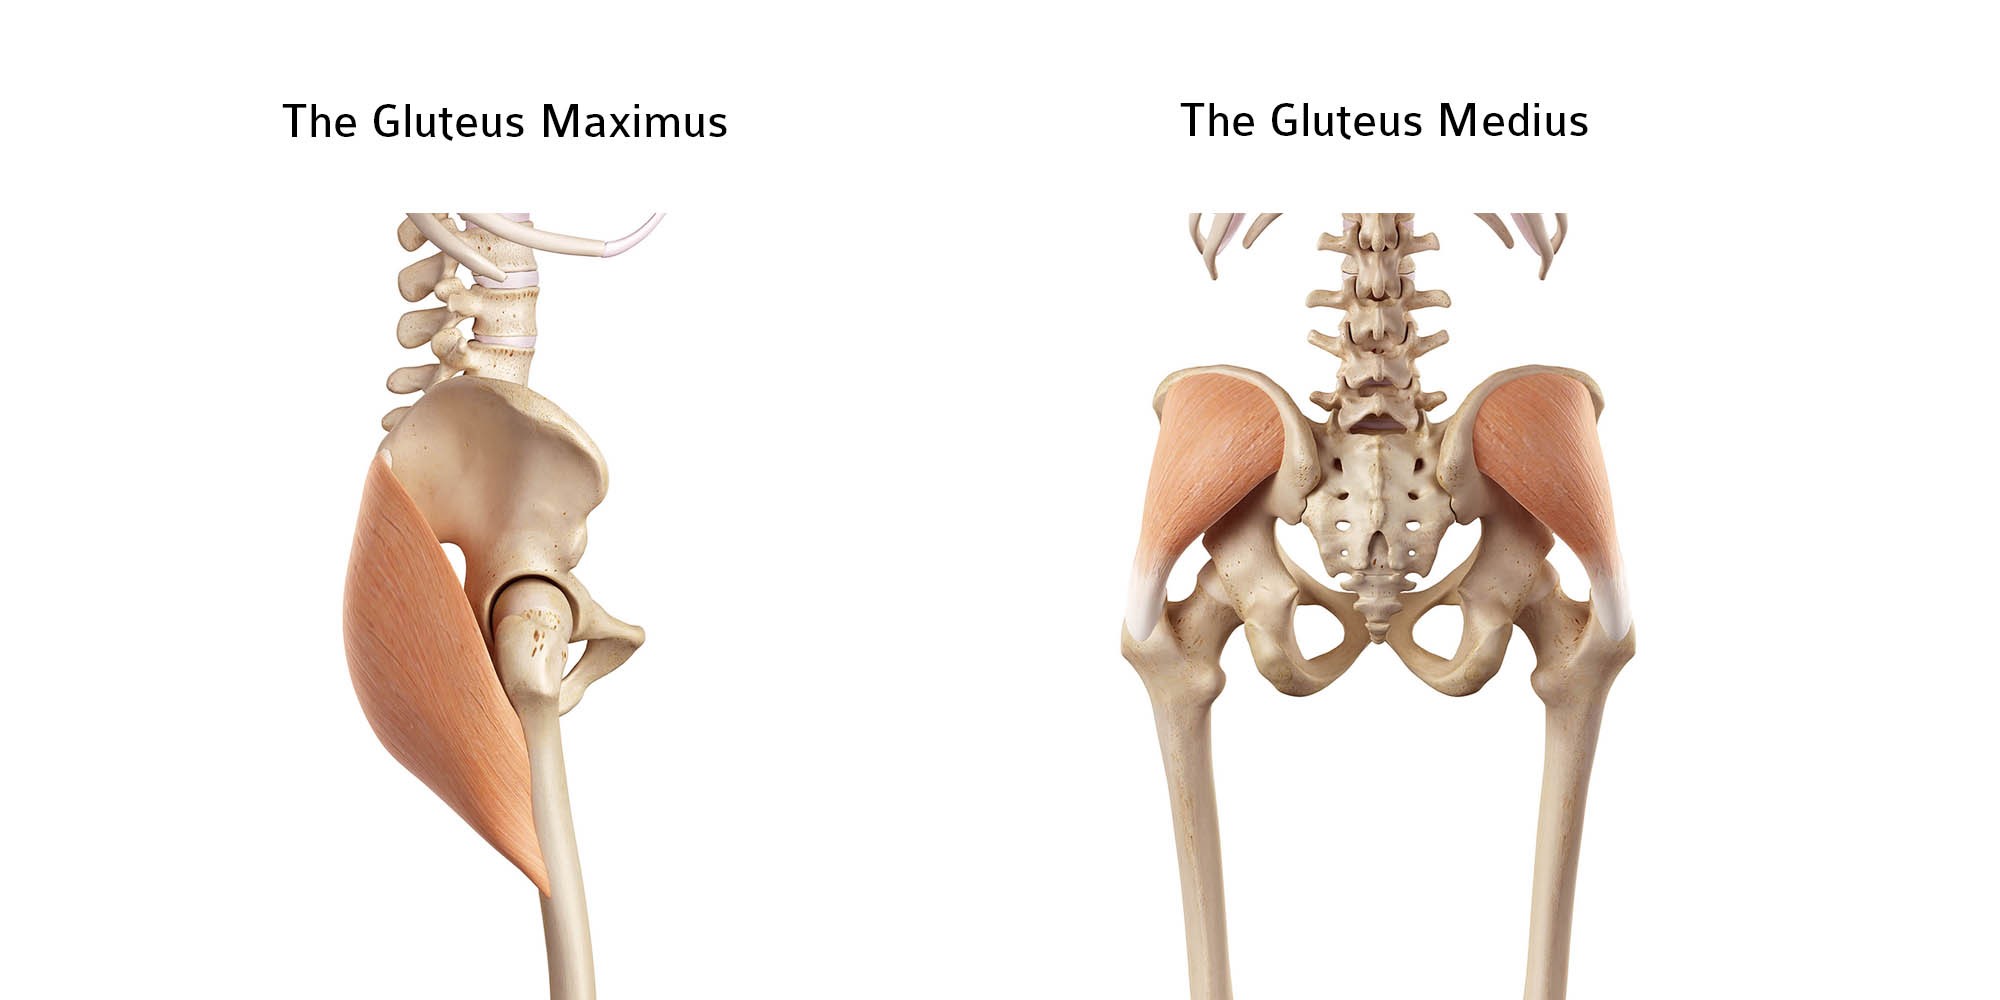
The first two exercises are designed to get your glutes working, specifically your gluteus maximus and gluteus minimus.
The gluteus maximus, or ‘glute max’, is the largest of the three gluteal muscle and primarily works to extend your hips, making it incredibly important for standing up, running, and jumping.
The gluteus medius and minimus are the two smaller glutes which, along with the glute max, make up your buttocks. These two muscles facilitate various hip actions but also act to stabilise the hips and pelvis when the opposite leg is raised from the ground. It’s clear to see why they are extremely important for low back and lower limb health.
It’s common for the glutes to become underactive. When this is the case, we often prescribe glute activation exercises to get them working again.
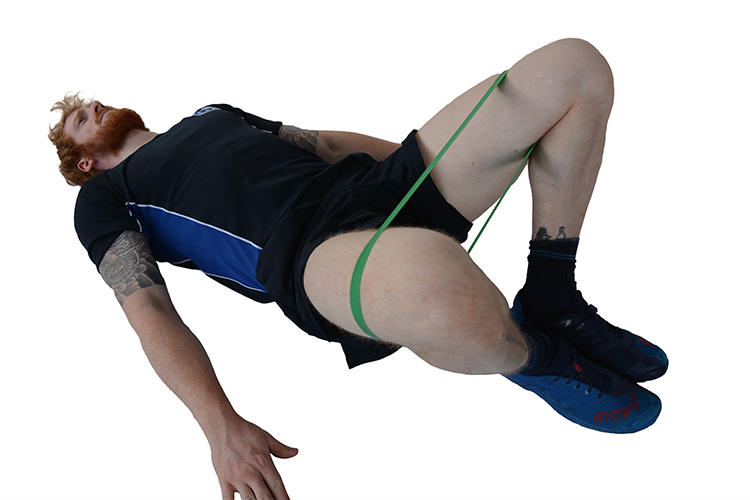
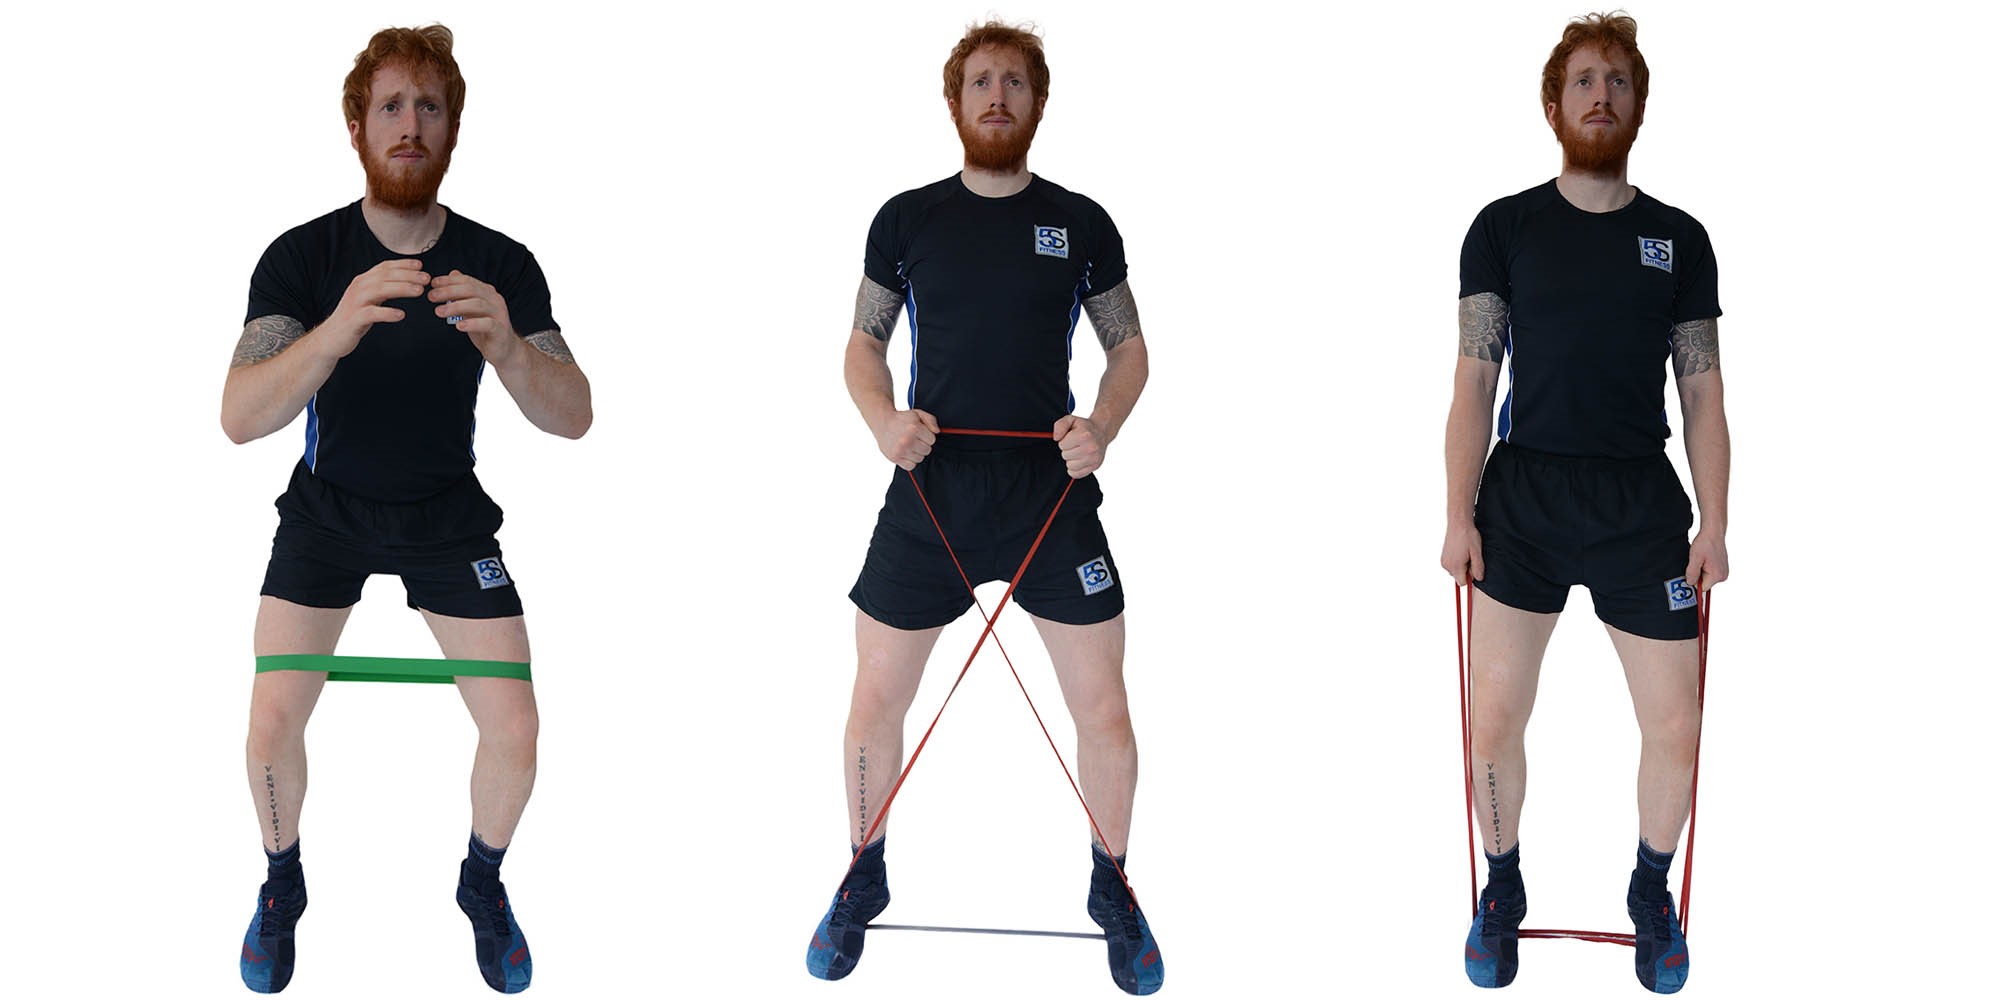
Banded Glute Bridges
Banded glute bridges can be performed without a band, but placing a band around your knees and abducting your legs (driving your knees apart), really helps to maximise glute engagement as you extend your hips up from the floor.
This exercise specifically targets the gluteus maximus (main buttock muscle), which is responsible for extending your hips. Hip extension is your driving force when running; which is why development of your glutes and hamstrings (hip extensors) is so important.
1. Sit on the floor and place a small band around your legs, just above your knees.
2. Lie back so your head is flat to the floor.
3. Place your hands to the side.
4. Bend your knees and bring your heels towards your glutes. This prevents your hamstrings from taking over the work.
5. Place your feet flat to the floor, either together or hip width apart.
6. Spread your knees apart to abduct and externally rotate your hips.
7. Squeeze your glutes and extend your hips.
8. Hold at the top for 2-3 seconds before returning to the starting position.
9. Complete 3-5 sets of 20-30 reps.
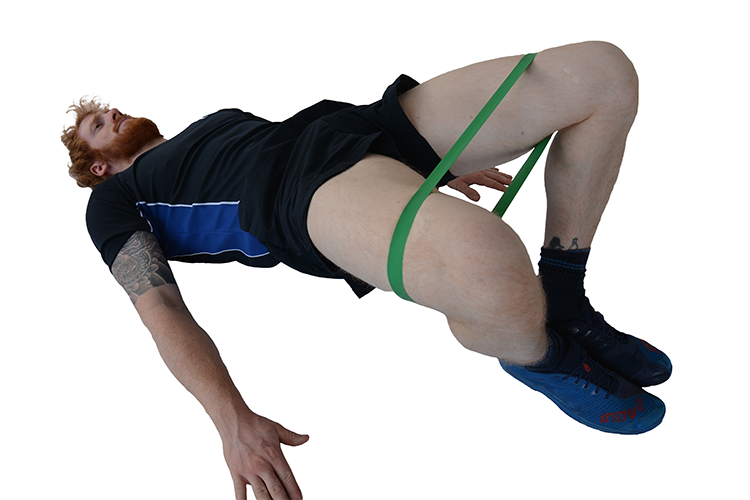
Above is the standard glute bridge set up. However, there are a few slight changes that can be made to help increase glute engagement.
Give them a go and see what works for you.
1. Tilt your pelvis by bringing your lower back flat to the floor.
2. Flex your head slightly, bringing your chin to your chest, rather than keeping it flat to the floor.
3. Coming up onto your heels and taking your toes off the floor.
4. Rather than having your palms flat to the floor, bend your elbows, clench your fists, and drive your arms into the floor.
Banded Lateral Walks
Lateral band walks are a superb exercise for your glute medius, which is responsible for stabilising while on one leg.
If this muscle is not pulling its weight, other muscles must compensate. This can often lead to injuries; therefore, it is beneficial to strengthen and build endurance in this muscle.
This drill can be done with a short band placed just above or below your knees, or with a long band using either the X-drill, or looping the whole band under the arches of your feet (my personal favourite).
1. Take a long band and hold it at either end in each hand.
2. Loop the band under the arches of your feet.
3. Stand up tall with good posture, bend your knees slightly.
4. Step 1-2 foot lengths to the right. Stay in control and don’t allow your leg to be dragged by the band.
5. Complete 3-5 sets of 10-20 strides in each direction.
The third exercise is my favourite stability drill:
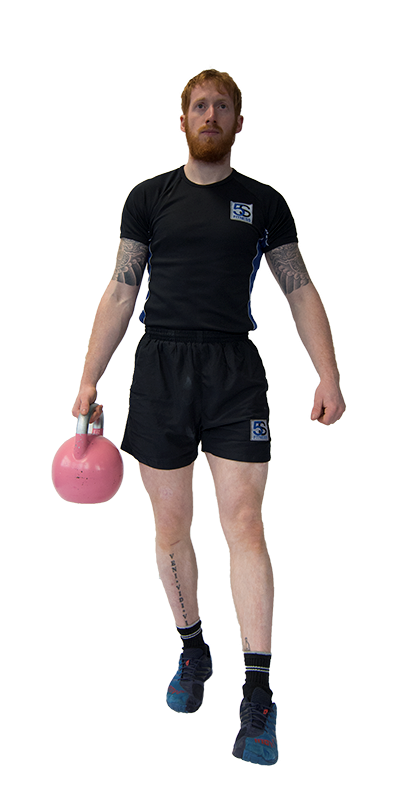
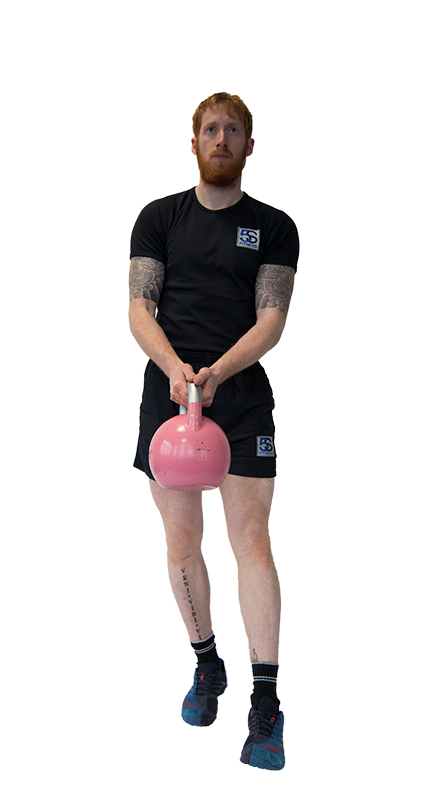
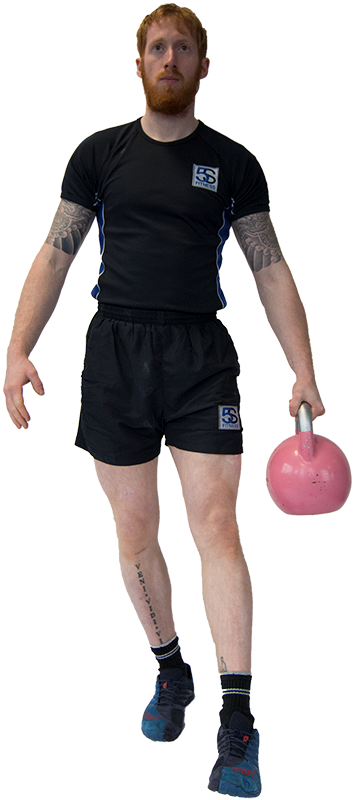
Single Leg Swap
This simple exercise is much harder than it looks. It is superb for foot and ankle stability, as well as a great core stabiliser.
While standing on one leg, pass a weight across your body, the shift of weight will pull your supporting foot and knee into various positions. You must resist these forces.
While standing on your right leg, pass the kettlebell to your left hand. Resist your right knee falling into valgus, and the arch of your right foot collapsing inwards (over-pronating/eversion).
As the kettlebell is passed back to your right hand, resist your knee falling into a varus position (falling outwards), and your foot rolling onto its outer side (supination/inversion).
This all makes the single leg swap an awesome proprioception drill.
Proprioception is “the body’s ability to transmit a sense of position, analyse that information and react to it” (touching your nose with your eyes closed), therefore it effects balance, coordination and agility.
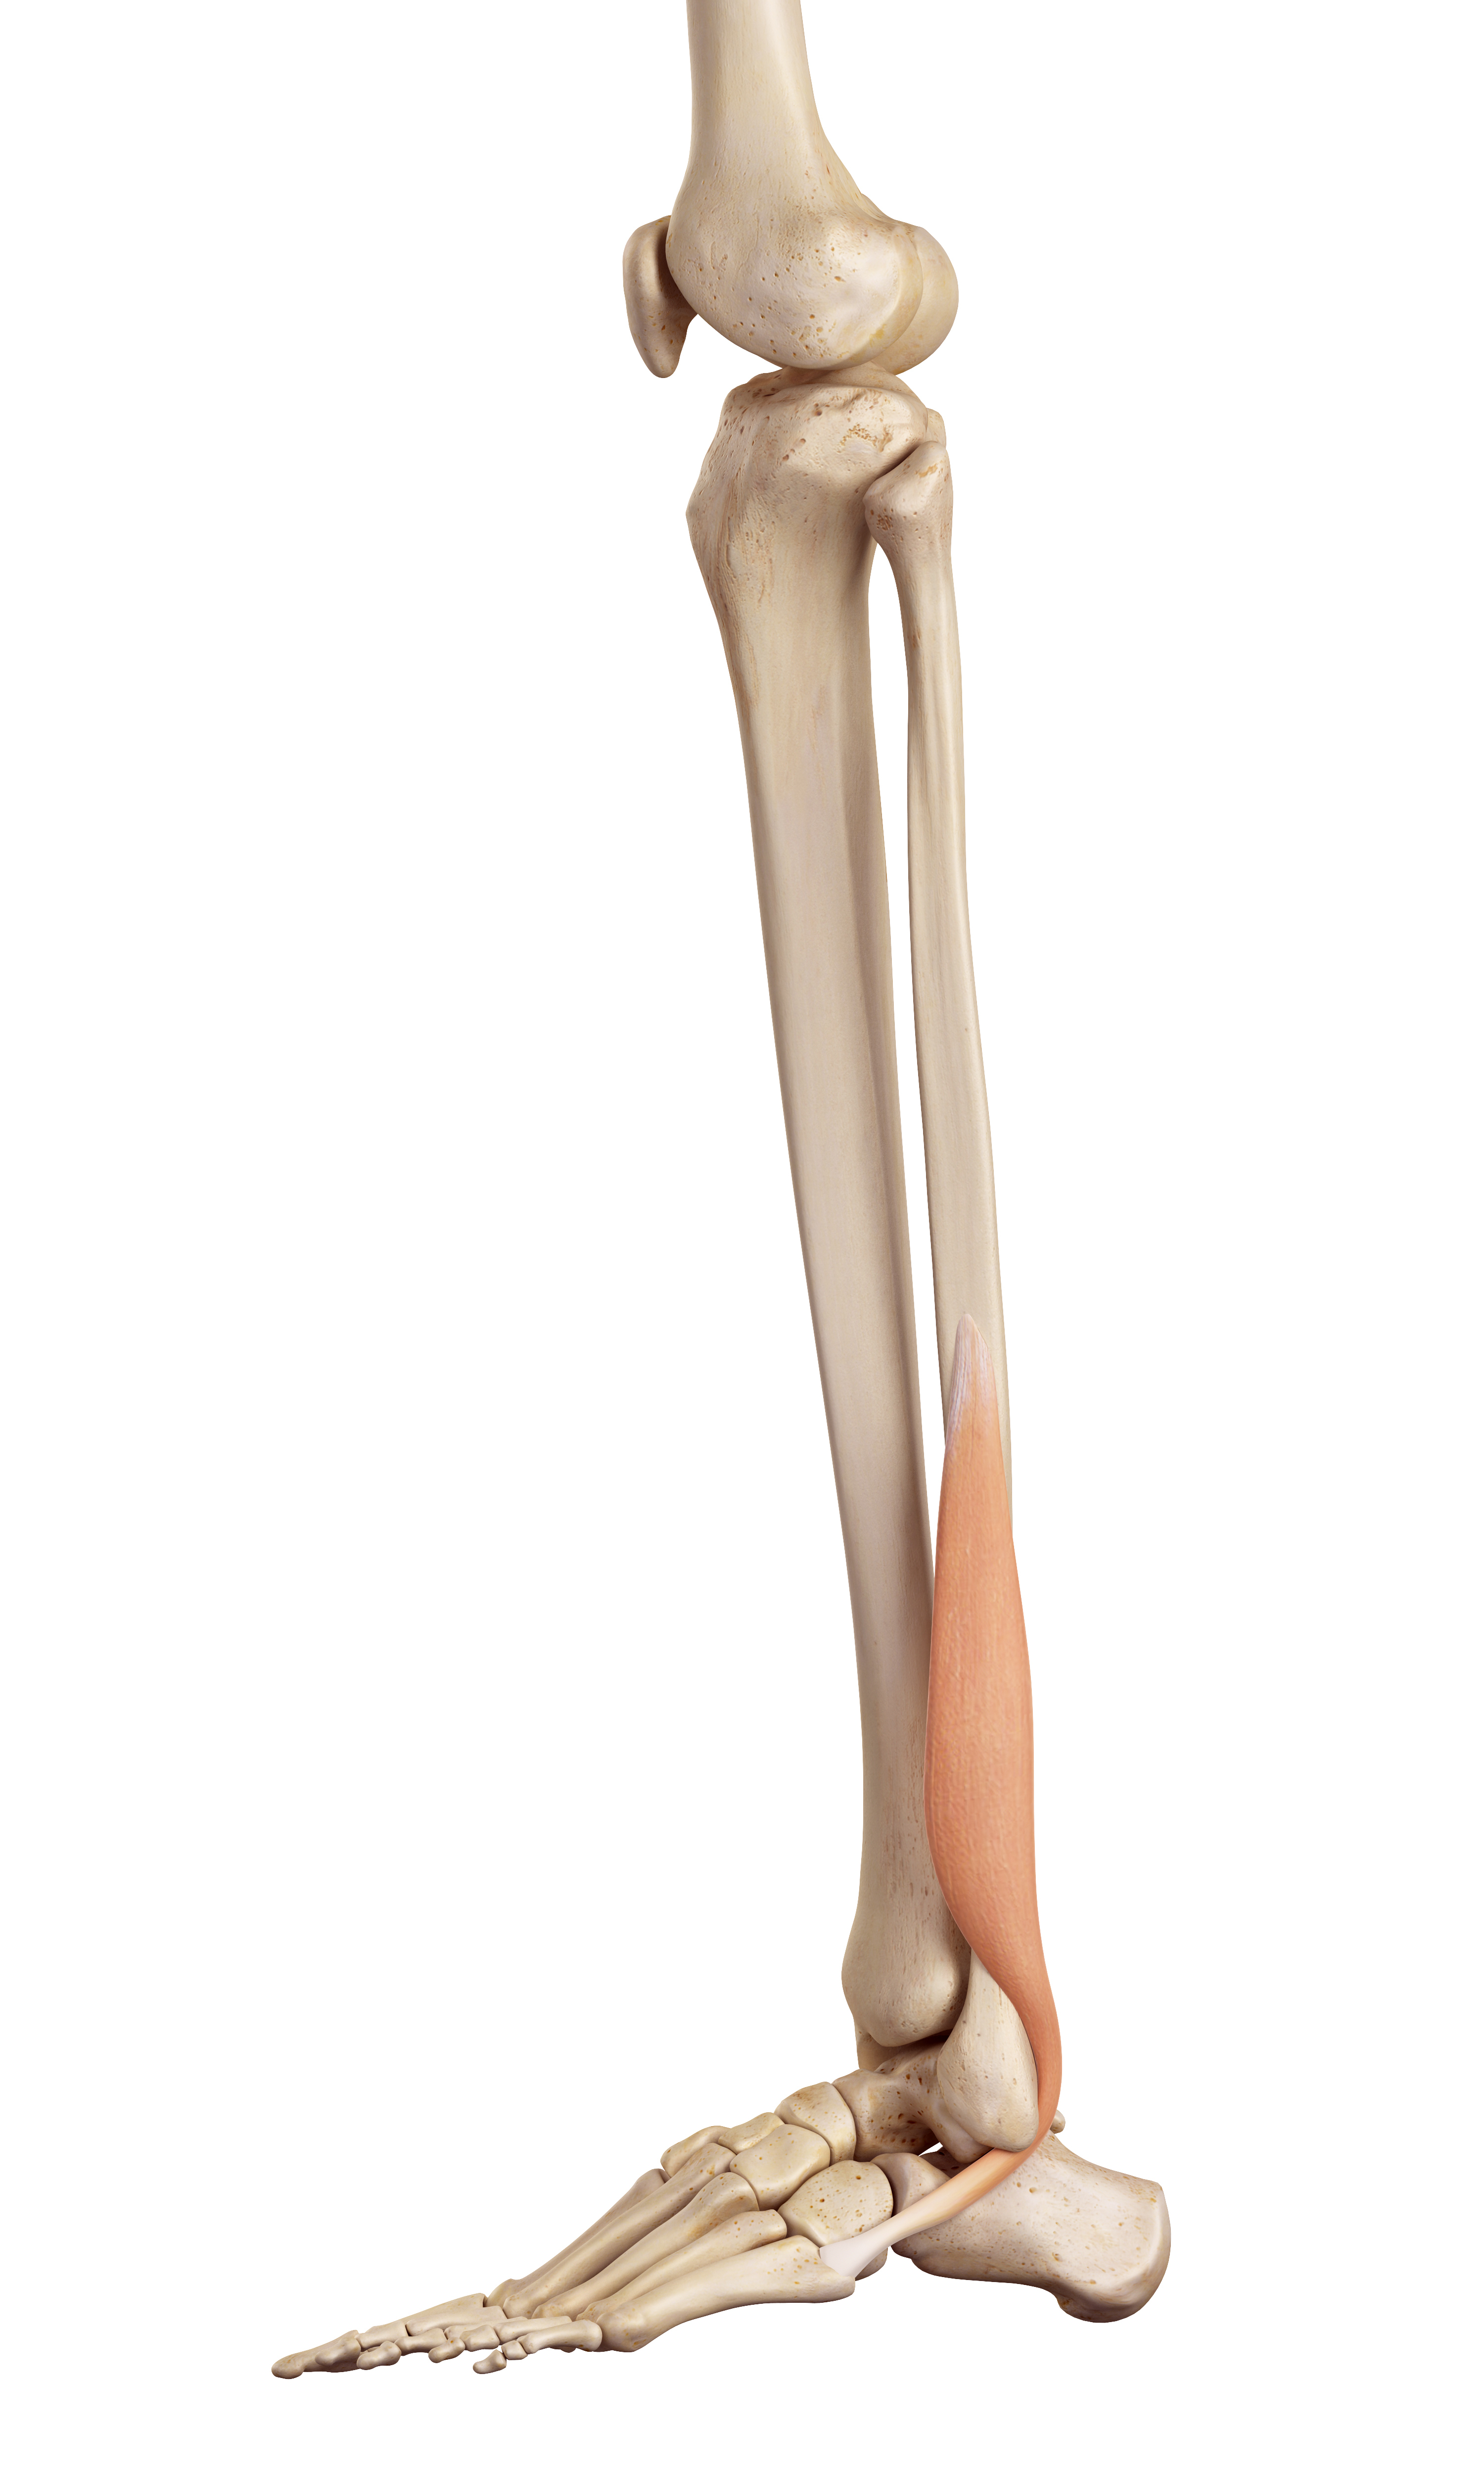
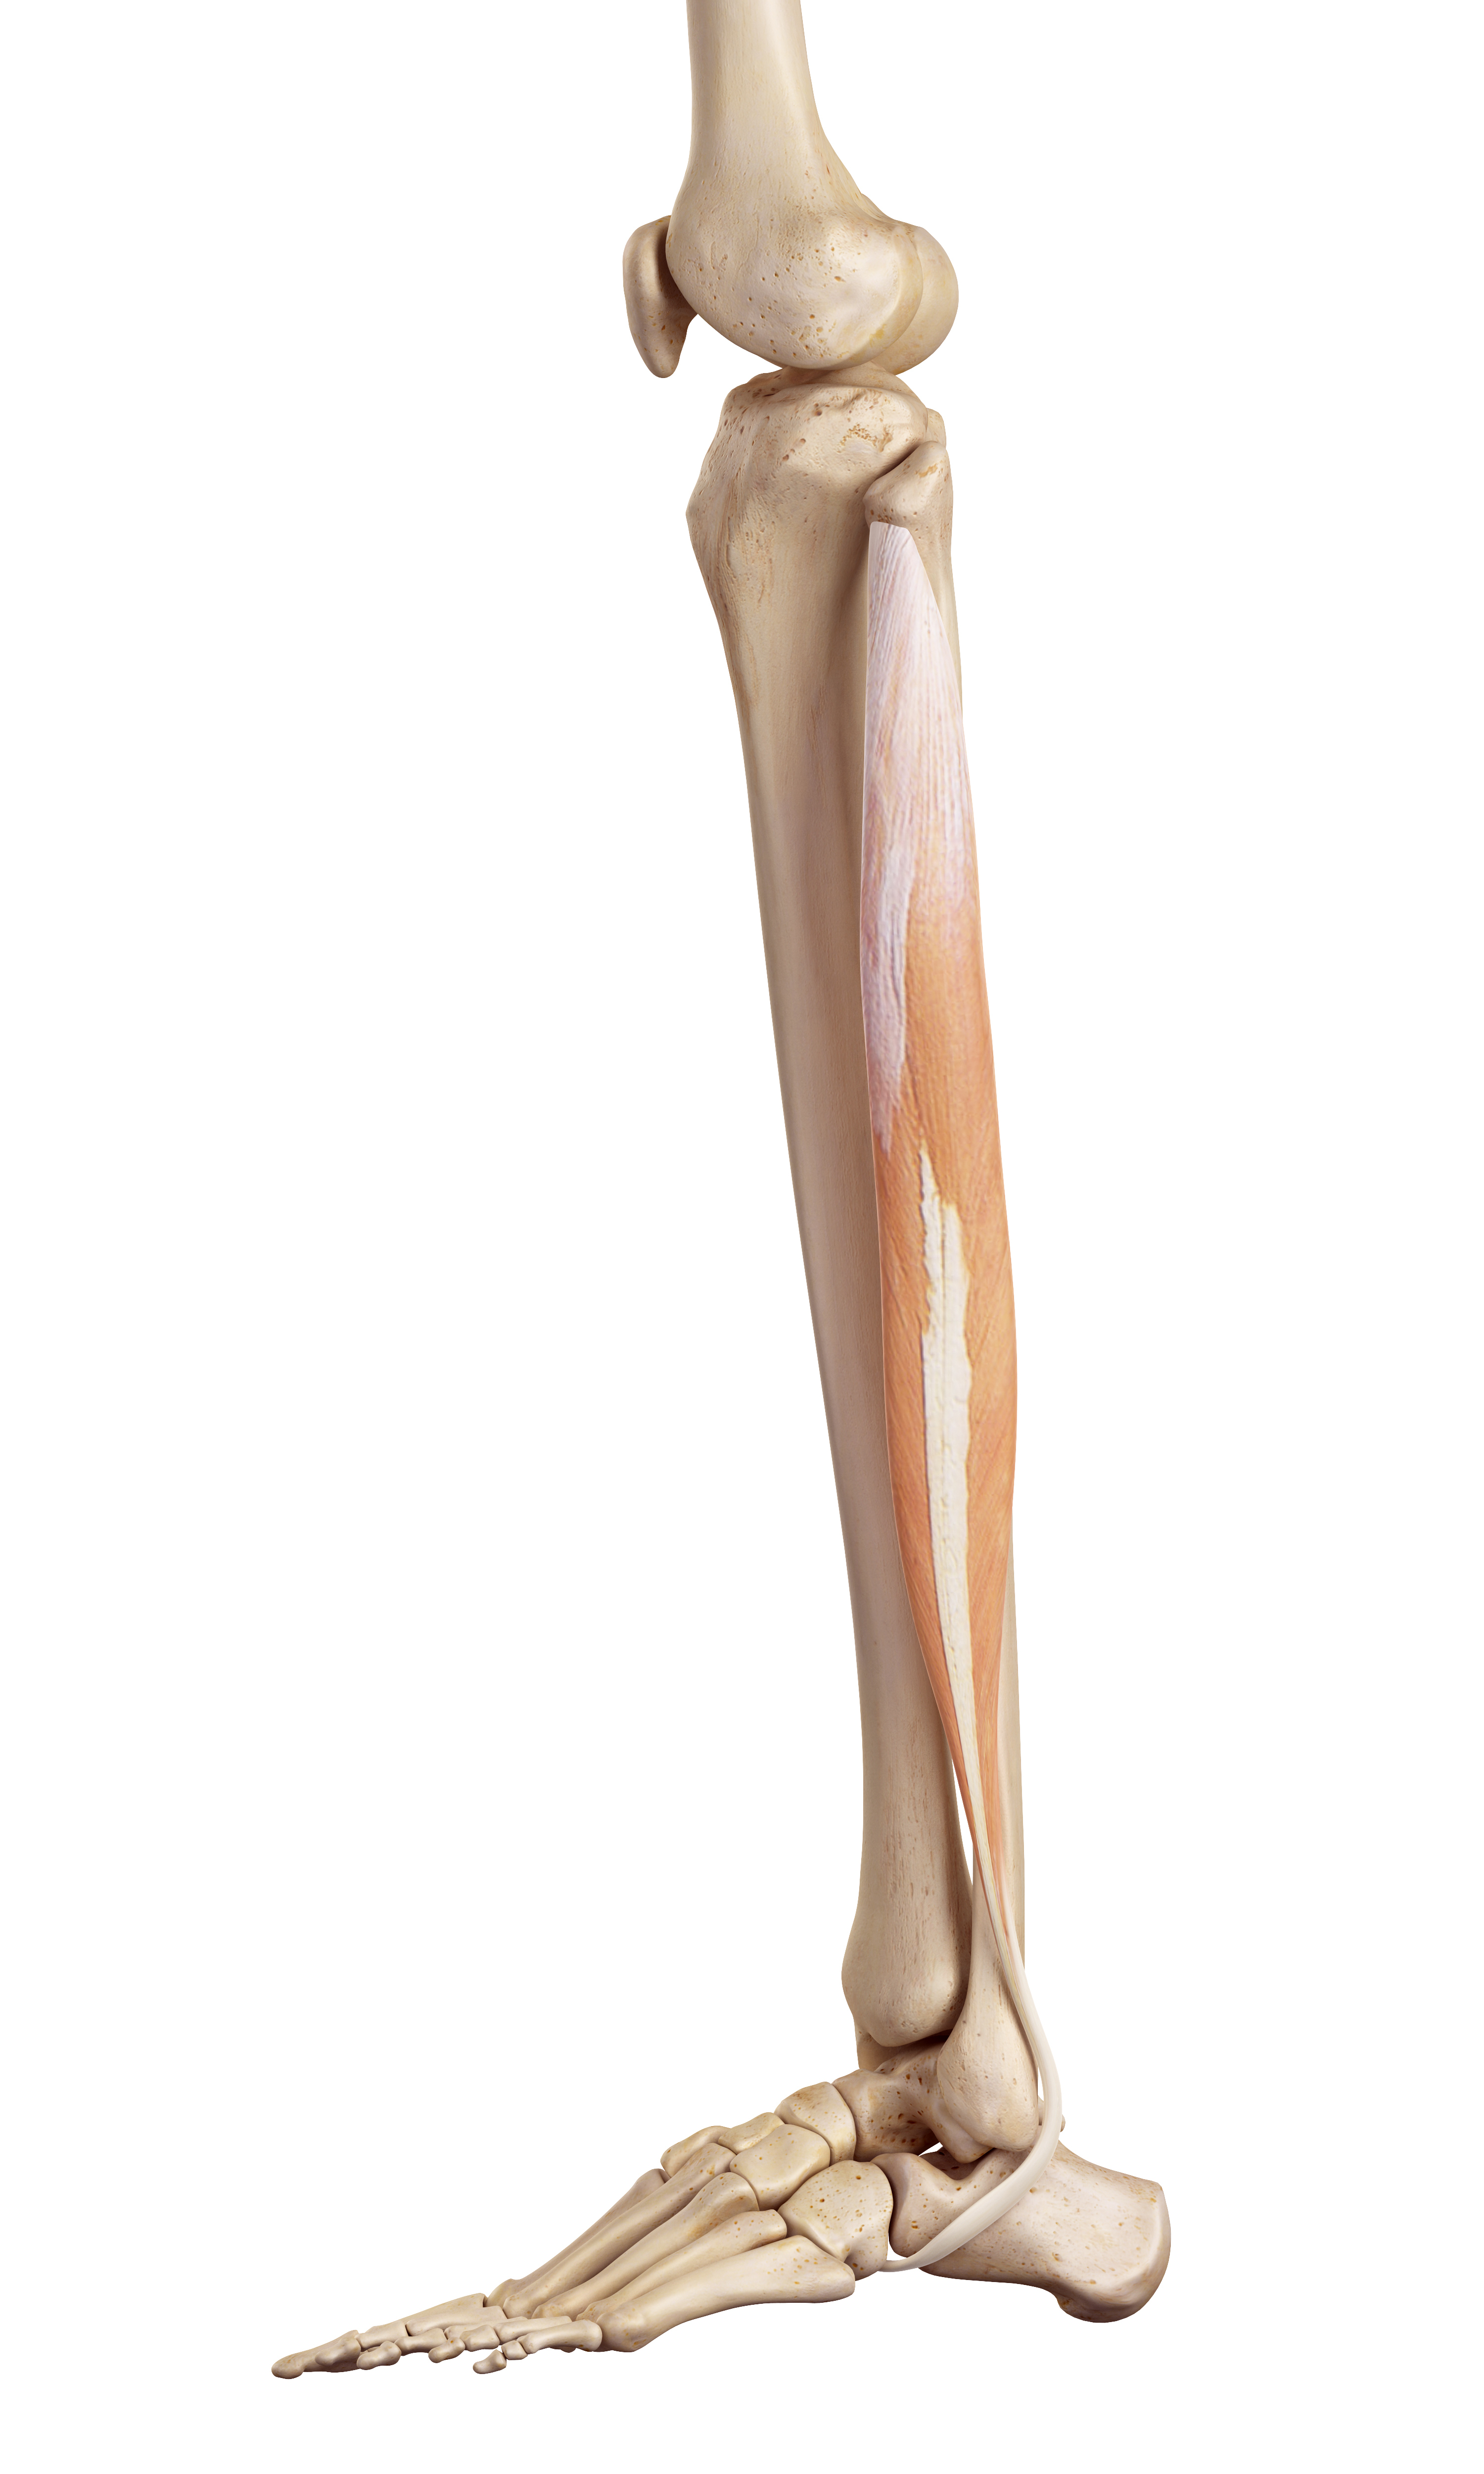
Proprioception is vital to injury prevention. For example, as your ankle begins to roll outwards, receptors called muscle spindles in your peroneus muscles (picture below – Brevis & Longus) will detect the change of length (stretch) and stimulate a contraction of that muscle to prevent injury to the ankle.
A dumbbell can be used, but a kettlebell works best.
1. Pick up a kettlebell and hold it in your right hand.
2. Stand on one leg, raising the leg to the front.
3. Slowly pass the kettlebell from your right hand to your left hand. Hold it steady in your left hand at your side for second before passing it back across to your right hand.
4. Keep your core braced throughout. Don’t lean to the opposite side as you pass the kettlebell across.
5. Complete 2-3 sets of 10 passes on each leg.
Give these exercises a go and you will feel great… Maximise your performance and minimise your risk of injuries!
Thanks for reading
Jay
Follow us on:
Facebook: www.facebook.com/5sfitnessuk
Twitter: www.twitter.com/5sfitness
Instagram: www.instagram.com/5s_fitness
YouTube: www.youtube.com/channel/UC66XVf9NZBO8j-V4or5d2Tg